![]() Pinterest is an amazing place where we can spend hours browsing interesting pictures. Pinterest is not just for individuals but also for businesses, brands, non-profits, bloggers, retailers, media, professionals and more. An individual will create a normal Pinterest account, but if you’re a business, then it makes sense to sign-up for a Pinterest business account.
Pinterest is an amazing place where we can spend hours browsing interesting pictures. Pinterest is not just for individuals but also for businesses, brands, non-profits, bloggers, retailers, media, professionals and more. An individual will create a normal Pinterest account, but if you’re a business, then it makes sense to sign-up for a Pinterest business account.
You might be wondering what’s the difference between Pinterest personal account and business account? Well, there’s no difference looks wise as both the accounts look one and the same, and both receive the same features.
However, business users will receive updates on future products and services of Pinterest. Another difference is that there’s a different TOS (Terms of Service) agreement for both personal and business accounts. Lastly, instead of using your first name and last name, you need to enter only one business name as it is.
So if you’ve taken the decision to sign-up for a business account but you’ve previously created a personal (or individual) account, then don’t worry, there’s an easy way to turn your Pinterest profile into a business account. The advantage of converting your account instead of creating a new account is that you won’t lose any of your followers, which means no need to start from the scratch.
How to turn your profile into a Pinterest business profile
To convert a Pinterest profile into a Pinterest Business account, simply follow the below steps:
- Login to Pinterest and then go to business.pinterest.com.
- Click on “Join as a business” button.
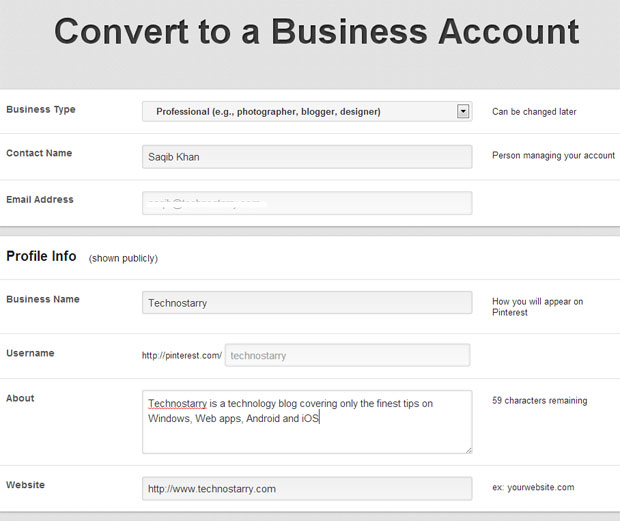
- You’ll now get a new page where you need to fill out your business information such as business type, contact name, email address, business name, username (this would also be the URL of your Pinterest business account), about and website URL.
- Scroll down to agree to the terms and then click on the “Convert” button.


That’s all you need to do to convert your personal account into a business account.
Verifying your Website on Pinterest
If you’re a business, then you won’t like to miss this step as it’s very important. When you verify your website, a little check mark, also known as verification badge will appear next to the website URL which will increase the trust of users about your website.
Pinterest says that right now you can only verify top level domains. With this point in mind, let’s proceed forward.
- Click on your business name from the top right side of the screen and then select “Your boards.”
- Click on the small pencil icon on your profile.
- Add your website to the Website field and then click on “Verify website.”
- Click on “Download Verification File” and then save the HTML file to your computer.
- Now you need to upload this HTML file to you web server at the root folder. This can be done by using FTP client like Filezilla or cPanel’s File Manager. Note that you should not upload the file to any sub-folder or else you’ll not be able to verify your site.
- Go back to Pinterest and then click on “Complete Verification.”
If you’ve followed every step correctly, then you’ll be able to verify your website in no time. Once verified, you’ll get a tick mark next to your website link in the profile.
It surely is a good idea to verify your site, and it would just take a few minutes to do that.
While you’re here, do follow us on Pinterest!
Also Read: Tips and Tricks to Use Pinterest Effectively
Leave a Reply